
Description
Our Eventbrite integration with gives you the ability to track the Audiences data on your Eventbrite page or events, right on your AdRoll dashboard and run campaigns for those Audiences.
Activate the Pixel on the Eventbrite page
Activate the Pixel on the Eventbrite page
Step 1: Navigate to the Website Audiences tab on the left navigation menu.
Step 2: Now click on Connect an Audience from the dropdown.
Step 3: From the Integration list, select Eventbrite.
Step 4: You will then be redirected to the Eventbrite login page. Once it is connected, the status should appear as such:
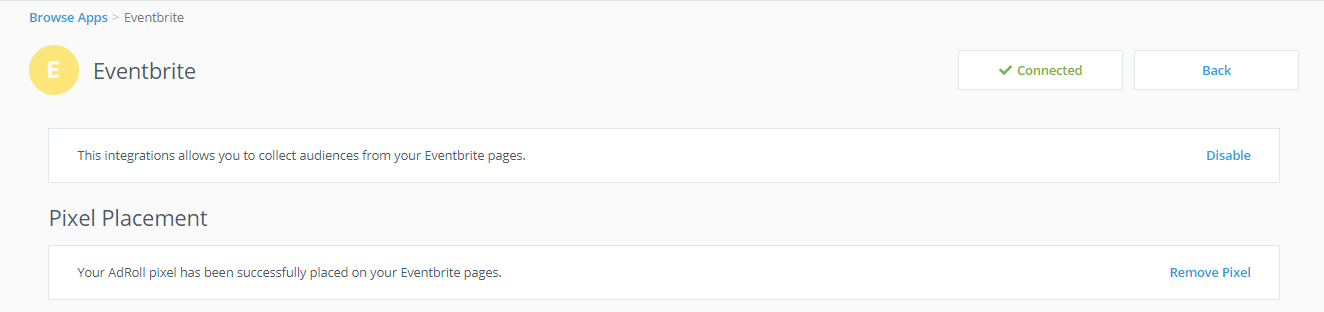
Note: Once done, you shall be able to check the Pixel status on the page using PixelPal.
Create the Audience Segment
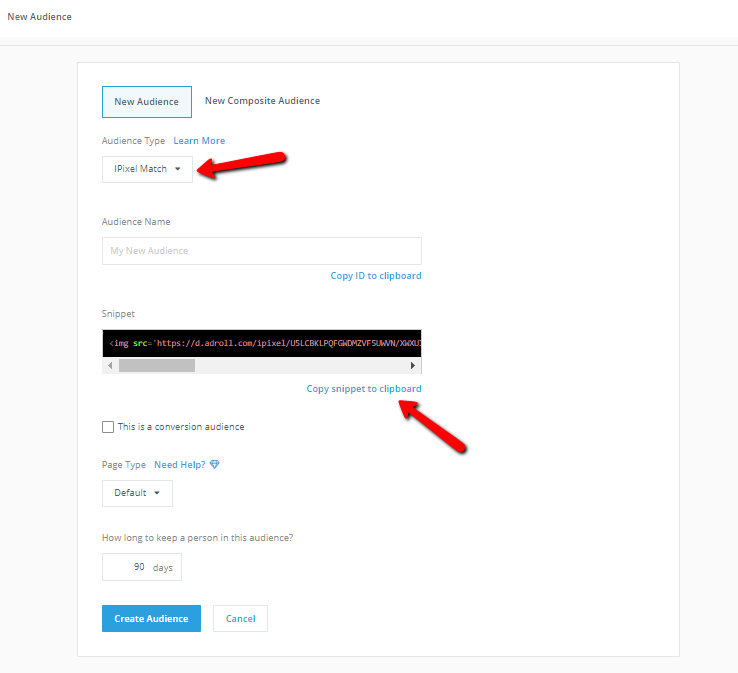
Step 5: Under the Audiences tab, create a new Audience segment, that will track the users from the Eventbrite page.
To set this up, click New Audience from the Audience tab. Select “IPixel Match” from the Audience Type dropdown, then copy the generated code snippet as shown in this screenshot:
Generate the Tracking URL
Step 6: The code generated from the above steps should like something like:
<img src='https://d.adroll.com/ipixel/<adv_eid>/<pix_id>?name= <segment id>' width='1' height='1' /><img src='https://d.adroll.com/fb/ipixel/<adv_eid>/<pix_id ?name=<segment id>' width='1' height='1'/>
From the above code generated, extract the piece of code with the following format:: https://d.adroll.com/ipixel/<adv_eid>/<pix_id>?name=<segment id>. This should be the final tracking URL that needs to be updated on the Eventbrite page.
Manage page on Eventbrite
Step 7: Go to your Manage page on Eventbrite.

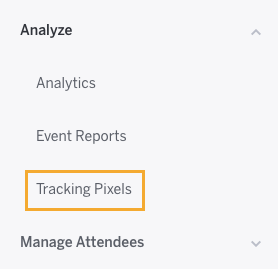
Step 8: Go to "Tracking Pixels" (under Analyze) on your Manage page in Eventbrite.
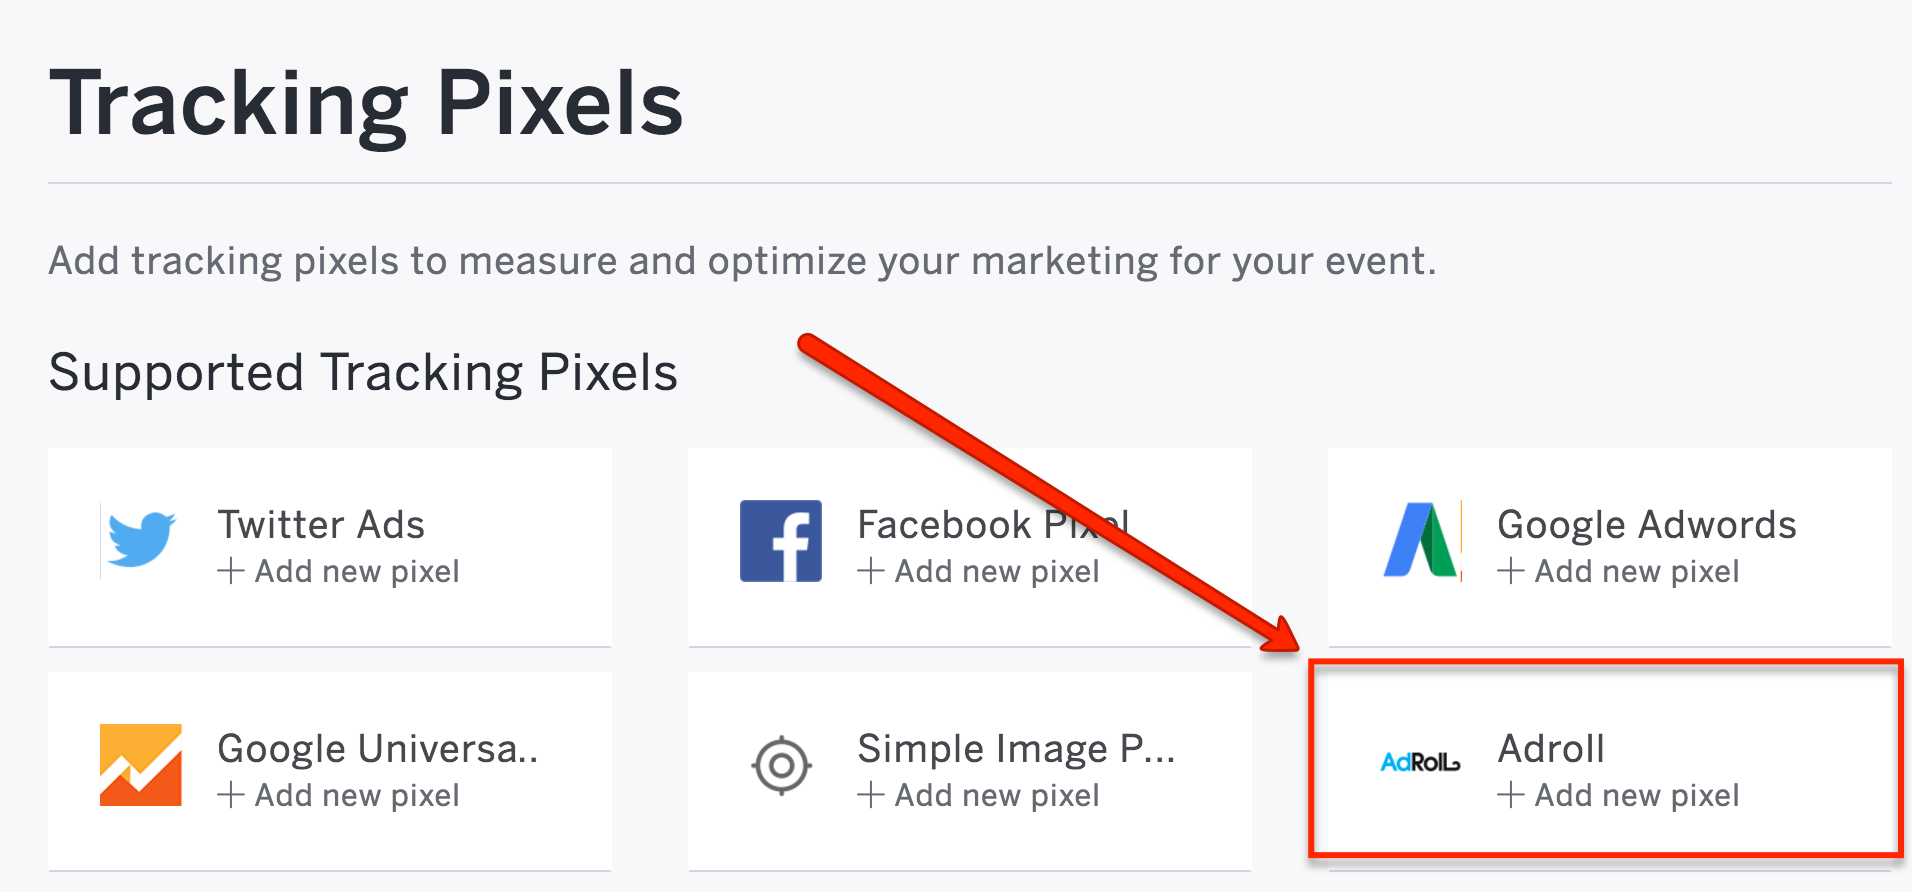
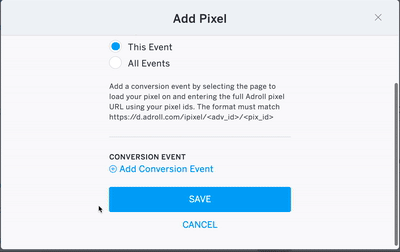
Step 9: Select the AdRoll tracking pixel button.
Step 10: Apply the tracking pixel to “This Event” or “All Events
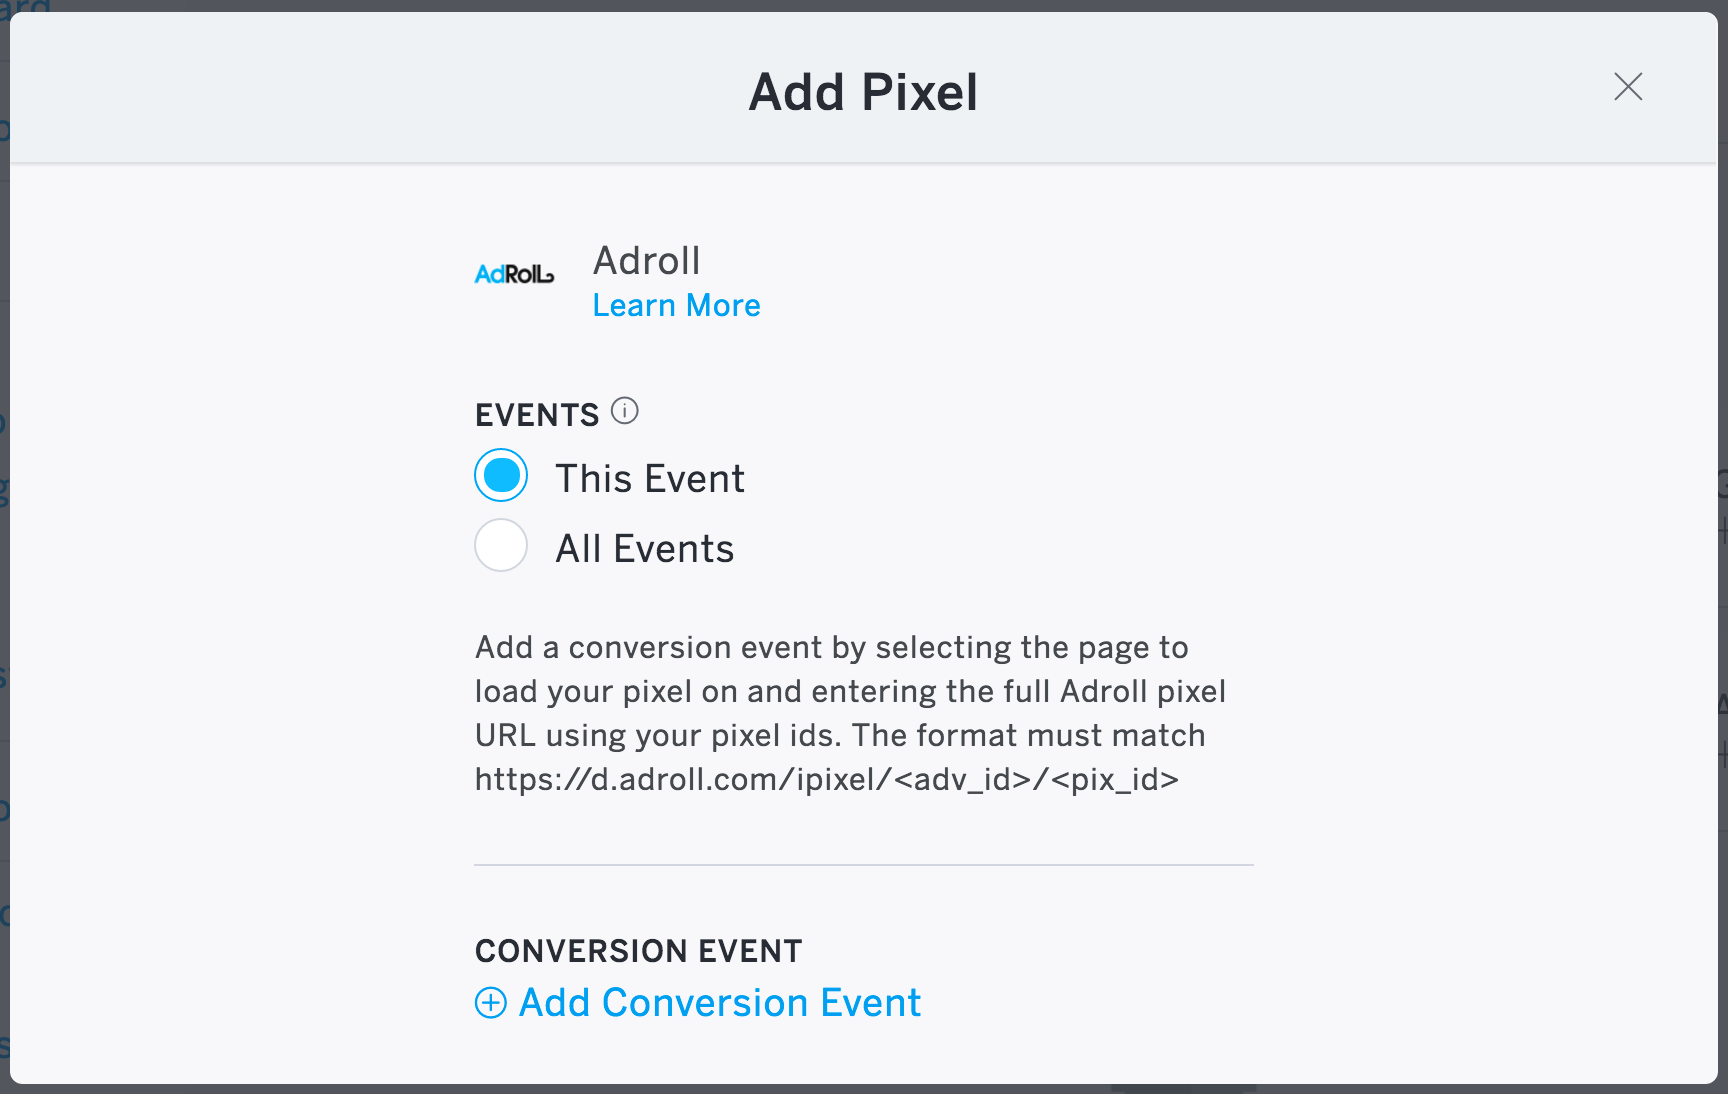
Note: If you add the Tracking ID to “This Event”, it’ll only be added to that individual event and won’t be copied to a new event if the event is copied. If you add the Tracking ID to “All Events”, it’ll apply to every event in the Eventbrite account, and when the event is copied, the Tracking ID will also be copied.
Step 11: Choose your Conversion Event and paste your AdRoll tracking URL (the one generated in Step 6).
- Click "Conversion Event" to choose one of the 3 conversion events that you can track through Eventbrite and then paste your AdRoll tracking URL.
The 3 conversion events are:
- Event Listing - Your event listing on Eventbrite
- Event Register - The registration form on Eventbrite (after an attendee selects to checkout/register)
- Event Order Confirmation - The order confirmation page on Eventbrite
Note: You can add multiple tracking pixels for each of the 3 conversion events. Just repeat the process for each conversion event.
Step 12: Save your changes.
Once done, you will be seeing the Audience segment accumulating visitors within the next 24 to 48 hours.
Note: It only tracks Web Matches, not Facebook Matches. This is because the Tracking URL field on Eventbrite only supports the format: https://d.adroll.com/ipixel/<adv_eid>/<pix_id>?name=<segment id> and not https://d.adroll.com/fb/ipixel/<adv_eid>/<pix_id>?name=<segment id>.
